Terracotta Pot Makeover: Easy Painted Planters on a Budget
What you'll need
- Terracotta pots with drainage holes
- Scrub brush and water
- Acrylic craft paint or chalk-style paint
- Baking soda (for a textured finish)
- Foam and flat brushes
- Painter's tape
- Waterproof clear sealer (indoor or outdoor rated)
- Fine sandpaper
Tap items to check them off — we'll remember your list on this device.
Plain clay pots are one of the most affordable planters around, and they are a perfect blank canvas. A terracotta pot makeover takes just a few hours, costs very little and lets you match your planters to any room or season. With the right prep and sealer, your painted pots will look great for years instead of peeling after the first watering.
This is also a wonderful project to do with kids. Little ones can paint polka dots and stripes while older kids try color blocking or patterns.
Why Terracotta Needs a Little Prep
Terracotta is porous, which is great for plant roots because it lets the soil breathe and dry out. But that same quality is why paint can bubble, flake or develop white crusty spots. Water wicks from the soil through the clay and pushes against the paint from behind, carrying mineral salts with it.
The fix is simple: start with clean, completely dry pots and seal them, especially on the inside if you are planting directly in them.
Terracotta Pot Makeover Step by Step
- Clean the pots. Scrub new or used pots with water to remove dust and soil. For old pots with white mineral buildup, a soak in a solution of one part white vinegar to a few parts water helps loosen it.
- Dry completely. Let pots dry for at least 24 hours, or longer in humid weather. Painting damp clay is the number one cause of peeling.
- Seal the inside. If you will plant directly in the pot, brush a waterproof sealer on the inside and let it dry according to the label. Leave the drainage hole open.
- Base coat. Brush on a thin coat of acrylic or chalk-style paint. Clay soaks up the first coat, so plan on two or three.
- Add details. Use painter's tape for stripes, color blocks or a dipped look. Remove the tape while the final coat is still slightly wet for crisp lines.
- Seal the outside. Once the paint is fully dry, apply two thin coats of clear sealer. Use an outdoor-rated product for pots that will live on the porch.
- Cure. Let the sealer cure for the time on the label before planting and watering.
Design Ideas to Try
Color Blocking and Dipped Pots
Tape off the rim or the bottom third of the pot and paint just that section. Leaving some natural clay showing keeps the look warm and earthy.
Textured Stone Finish
Mix a few spoonfuls of baking soda into acrylic or chalk-style paint until it is thick like frosting. Dab it on with a brush for a matte, stone-like texture that looks surprisingly high-end. Our DIY chalk paint recipe and chalk paint mixer will help you mix a base that works.
Whitewashed or Aged
Thin white paint with water, brush it on and wipe some away with a rag while wet. Lightly sand edges after drying for a weathered, garden-shed look. The same idea is behind our guide on how to distress painted furniture.
Kid-Painted Patterns
Polka dots made with the end of a pencil eraser, handprints or bright stripes make cheerful gifts. A painted pot with a little herb is one of our favorite DIY Mother's Day gifts.
Choosing Colors That Work
Painted pots look best when they relate to the room around them. A few approaches:
- Neutrals: Cream, warm white, charcoal and sand let the plants stand out.
- Tonal sets: Paint three pots in light, medium and dark shades of one color.
- Seasonal: Rust, mustard and olive for fall, or soft pastels for spring.
Not sure what goes together? Try our color palette generator for complementary and analogous combinations.
Caring for Painted Pots
- Always keep the drainage hole clear so roots do not sit in water.
- Use a saucer under indoor pots to protect furniture and floors.
- Bring outdoor clay pots inside before hard freezes. Wet terracotta can crack when water inside the clay freezes and expands.
- Touch up chips with leftover paint and a fresh coat of sealer as needed.
Painting Pots With Kids
A terracotta pot makeover is a great family activity, especially if you plan ahead for the mess. Cover the table, put kids in old shirts and give each child a small pot of their own. Washable kids' paint works for indoor pots that will not get wet, but acrylic craft paint holds up much better once the pot is watered, so use it with smocks and supervision.
- Let kids paint the outside only, then an adult can apply sealer outdoors or in a well-ventilated space.
- Choose easy plants like marigolds, beans or herbs so kids can watch something grow.
- Write each child's name and the date on the bottom with a paint pen.
Styling Your Planters
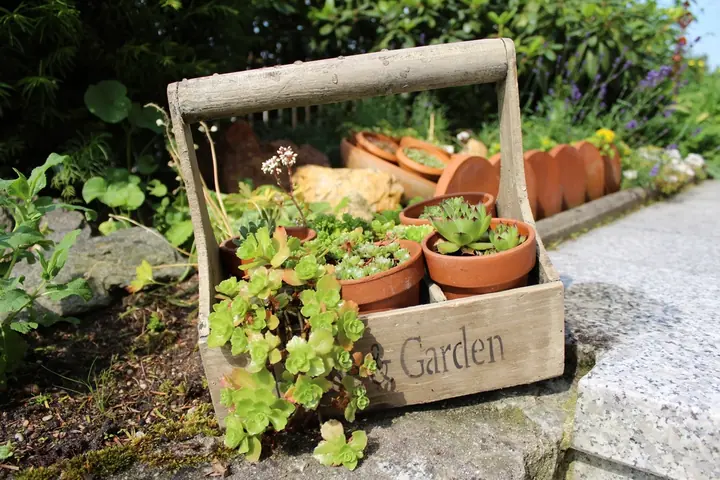
Group painted pots in odd numbers on a windowsill, line them along a shelf or tuck them into a wooden crate on the porch. In fall, mix them in with pumpkins and mums using our DIY fall porch decor ideas for a cozy, layered entry.
Frequently asked questions
Why is the paint peeling off my terracotta pots?
Terracotta is porous, so water from the soil travels through the clay and pushes paint off from behind. Make sure pots are completely dry before painting and seal both the inside and outside.
What kind of paint should I use on terracotta?
Acrylic craft paint and chalk-style paint both work well on clean, dry clay. Finish with a clear waterproof sealer, and use an outdoor-rated one for pots kept outside.
Do I need to seal terracotta pots before planting?
If you plant directly in a painted pot, sealing the inside helps keep moisture from ruining the paint. Leave the drainage hole open so excess water can escape.